FileGrab started as a file sharing tool. You create a link, share it, and people upload files to it. That covers photos, documents, videos — any binary data. But structured data (names, emails, feedback, choices) needed a separate service entirely.
Not anymore. FileGrab now includes a drag-and-drop form builder. Build a form, share the link or embed it on your site, and collect submissions from the same platform where you already manage file uploads.
Forms and Files in One Place
The core idea is pairing structured responses with file uploads. Some examples of what that looks like in practice:
- Event planning — an RSVP form for attendance details, plus a FileGrab upload link for guests to share photos afterward
- Client intake — a contact form for project details, plus a file upload link for assets, briefs, or reference materials
- Feedback collection — a form with rating stars and a textarea, plus a file upload link for screenshots or screen recordings
- Job applications — a form for personal details, plus a file upload link for resumes and portfolios
Each piece lives under your FileGrab account. No need to juggle Google Forms, Dropbox, and a spreadsheet. No Typeform subscription, no Google account, no third-party form service. If you already have a FileGrab account, you already have a form builder.
What You Can Build
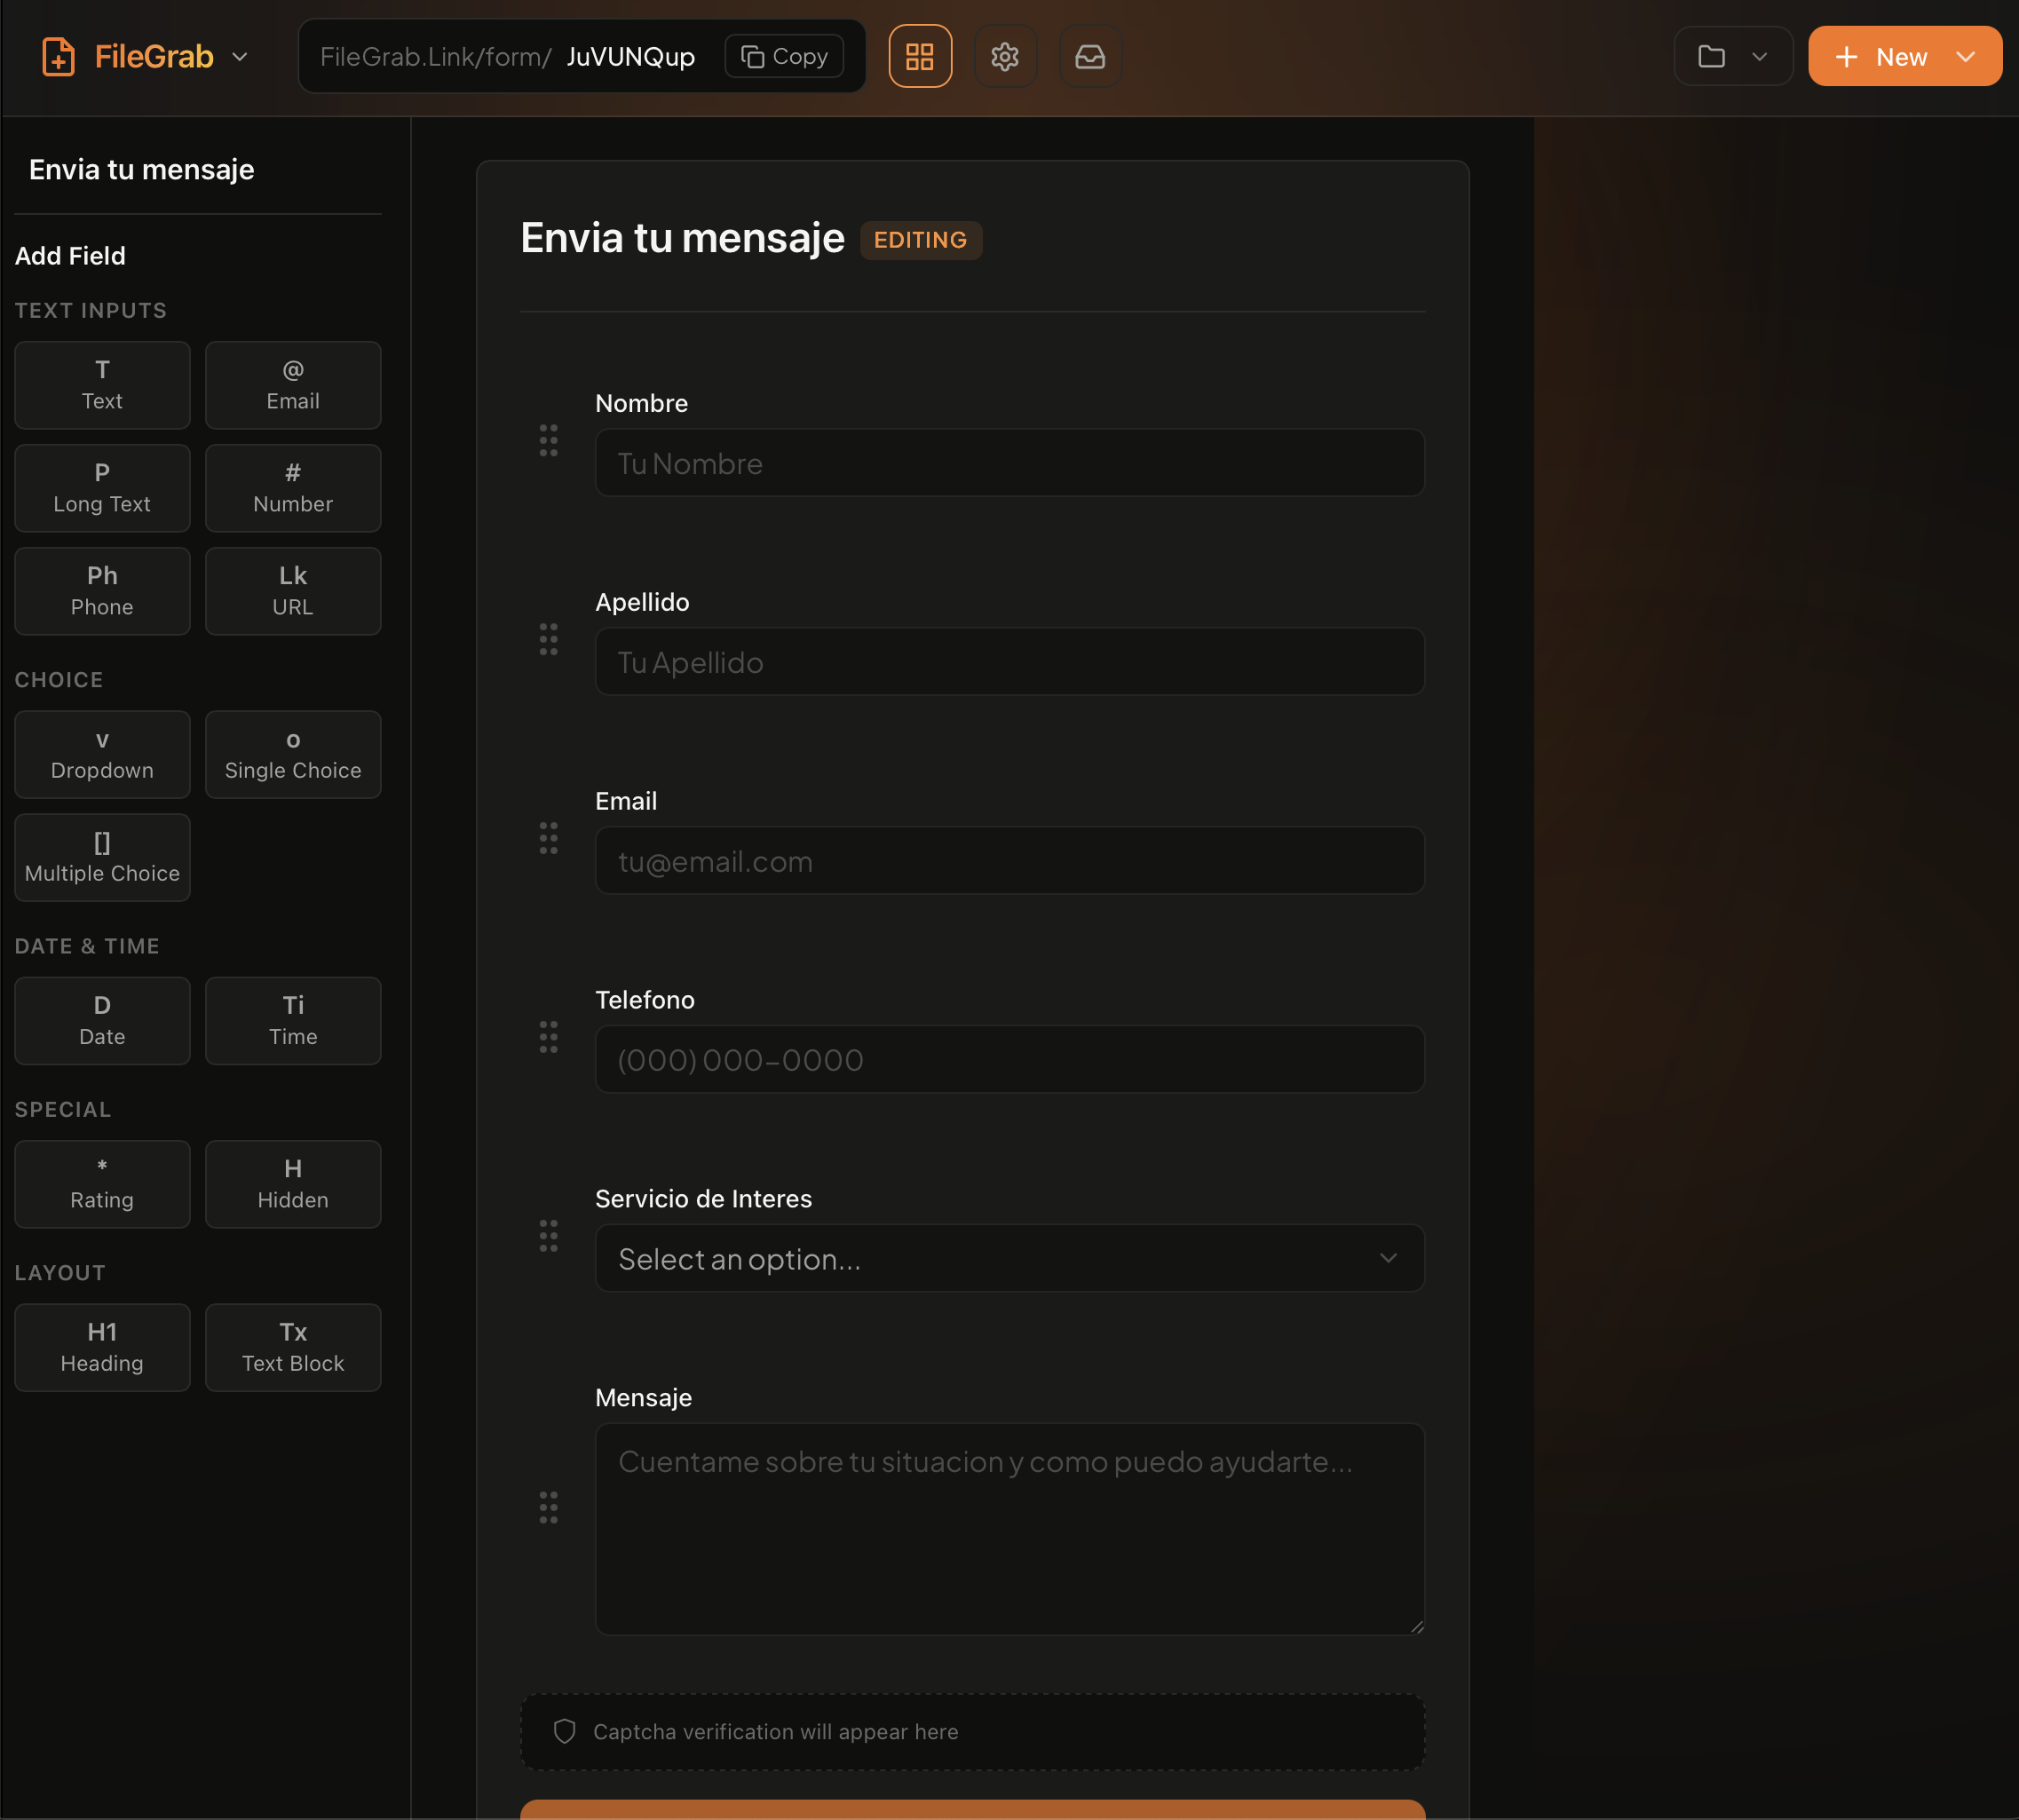
The form builder includes the field types you’d expect, plus a few extras:
- Text and Textarea for short and long answers
- Email, Phone, URL, and Number with built-in validation
- Select dropdown and Radio buttons for single-choice questions
- Checkboxes for multi-select
- Date picker
- Rating stars for satisfaction or quality scores
- File upload for attaching documents directly to a form submission
Drag fields to reorder. Toggle fields as required. Add placeholder text and configure validation rules per field.
How It Works
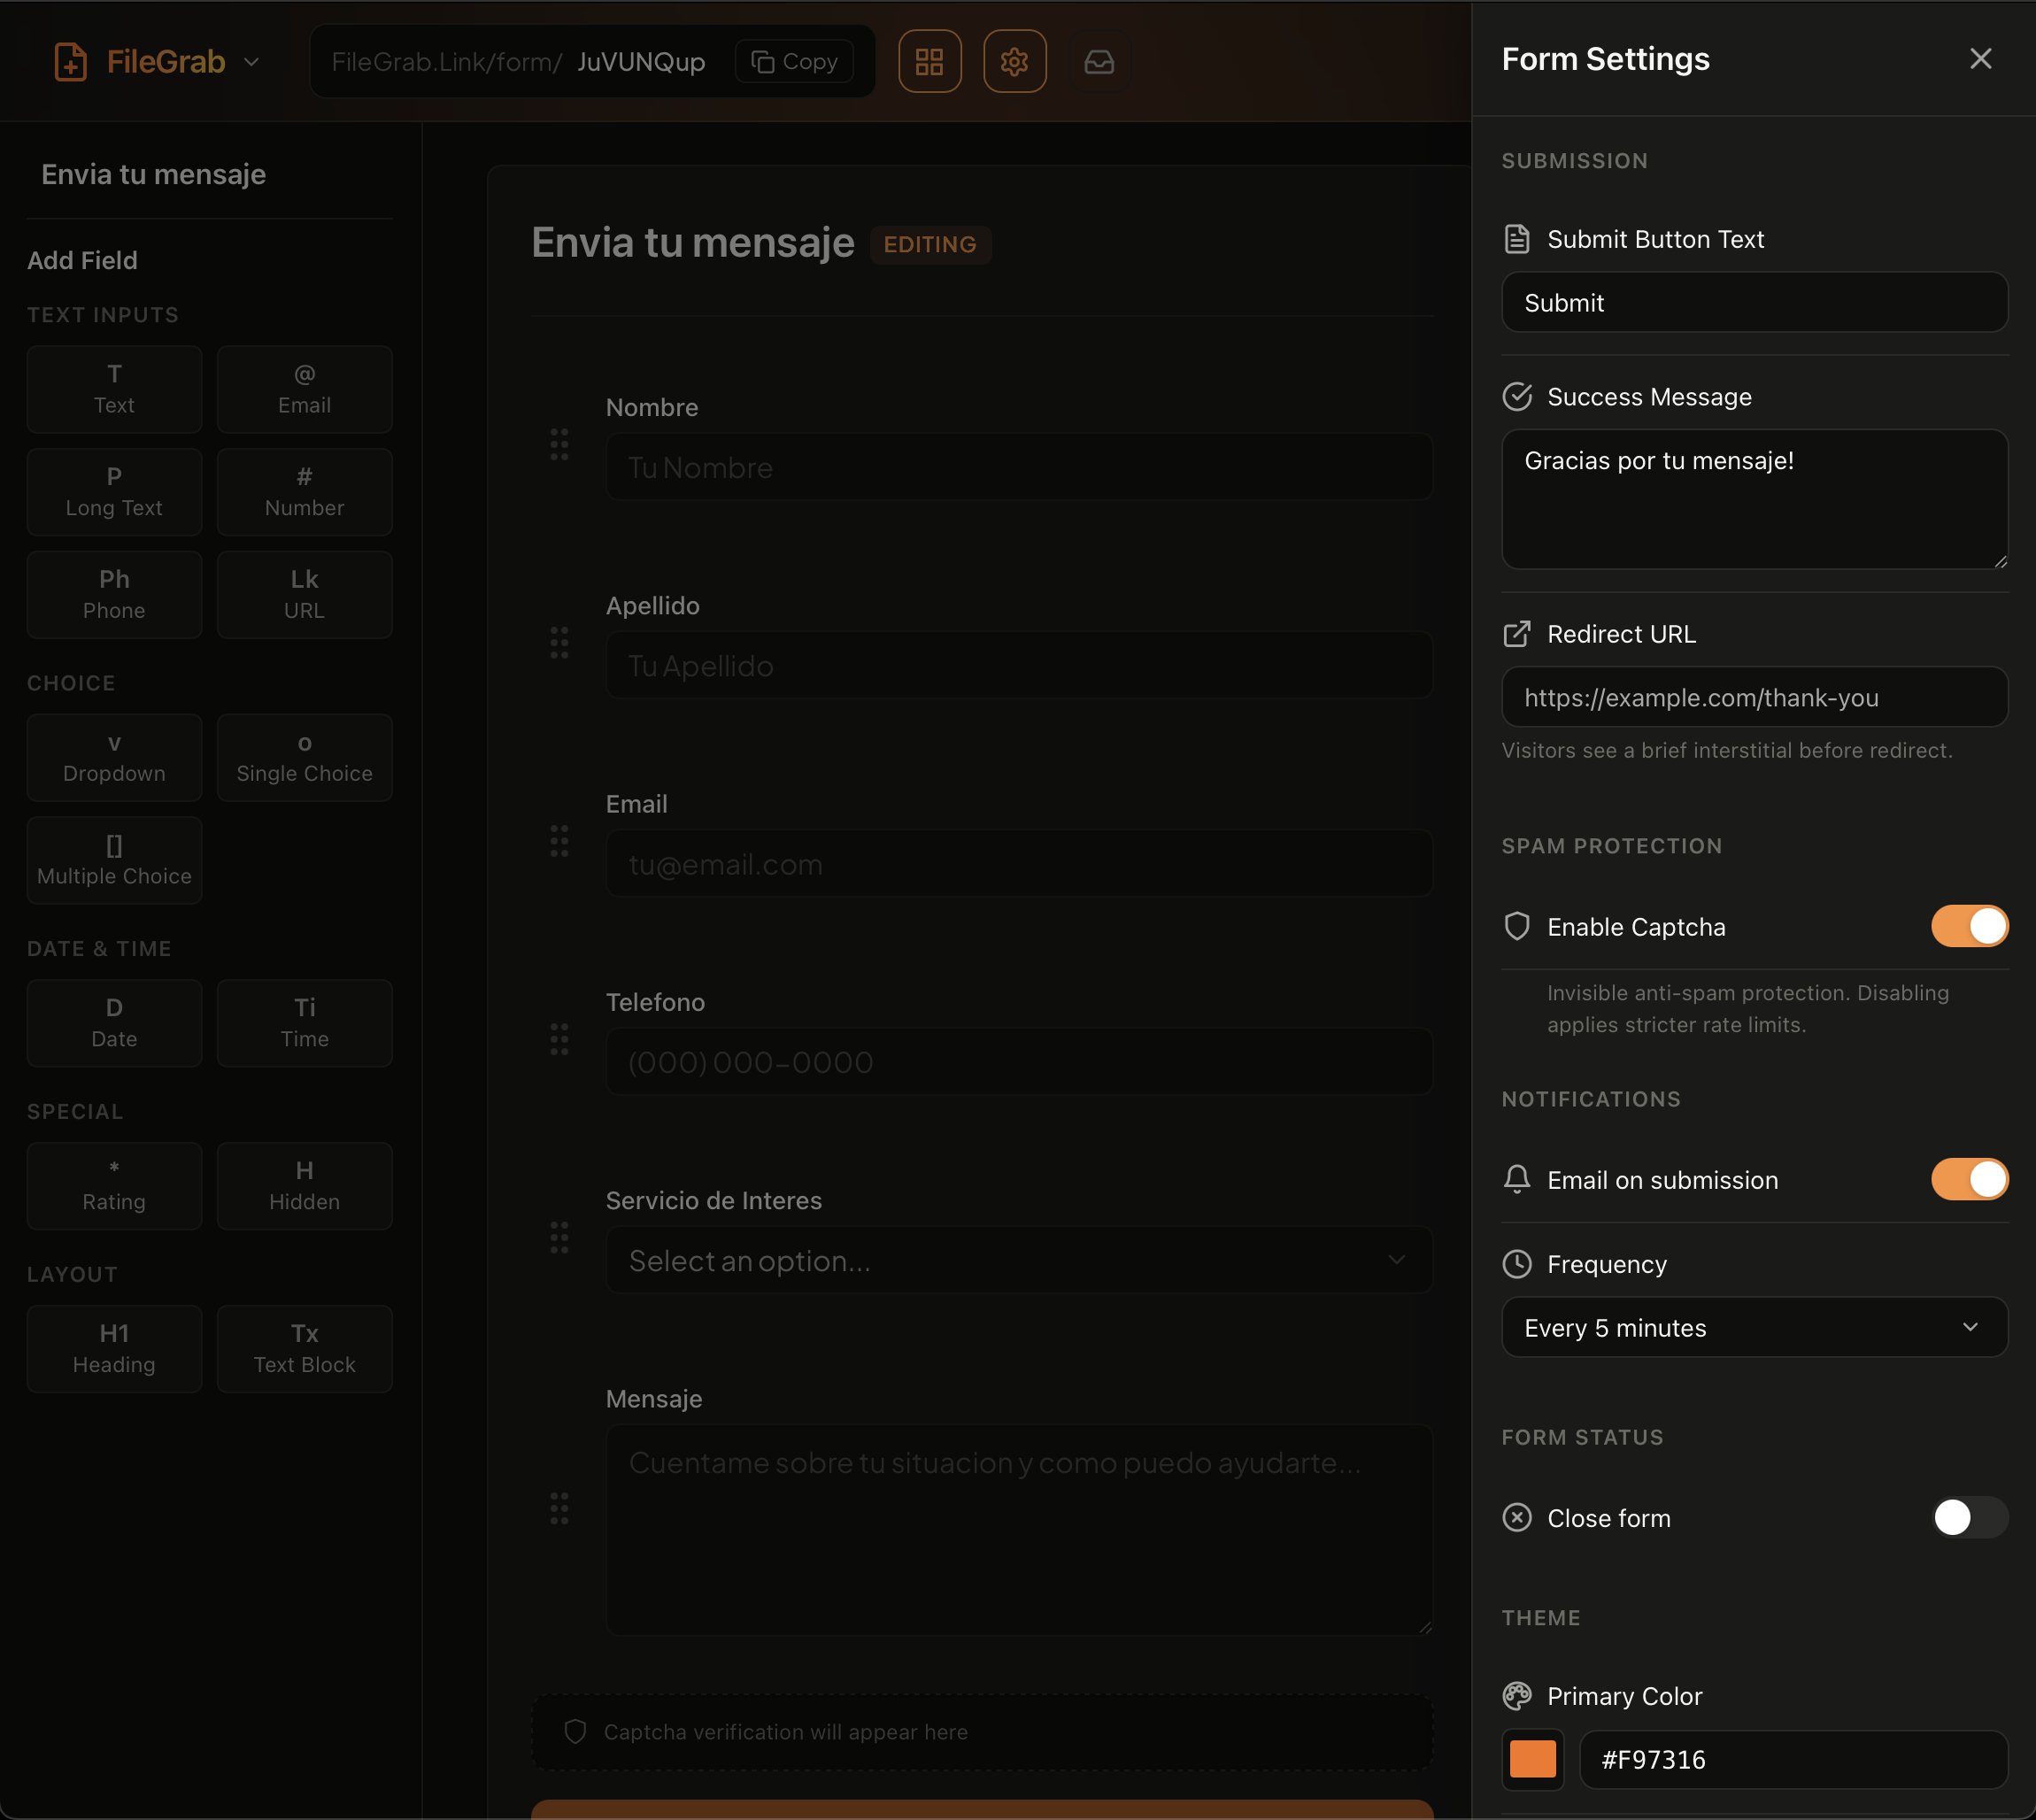
1. Build — Go to /form/new and add your fields. Set validation rules, customize the thank-you message, and configure a redirect URL if you want respondents sent somewhere after submitting.
Configure form settings like thank-you messages, redirect URLs, and notification preferences.
2. Share — Every form gets a direct URL. Copy it and send it via email, Slack, text, or social media. No account required for respondents.

3. Embed — Drop the form into any website with a single script tag. The form loads in a sandboxed iframe, so your site’s styles won’t conflict with the form, and the form’s styles won’t leak into your page.
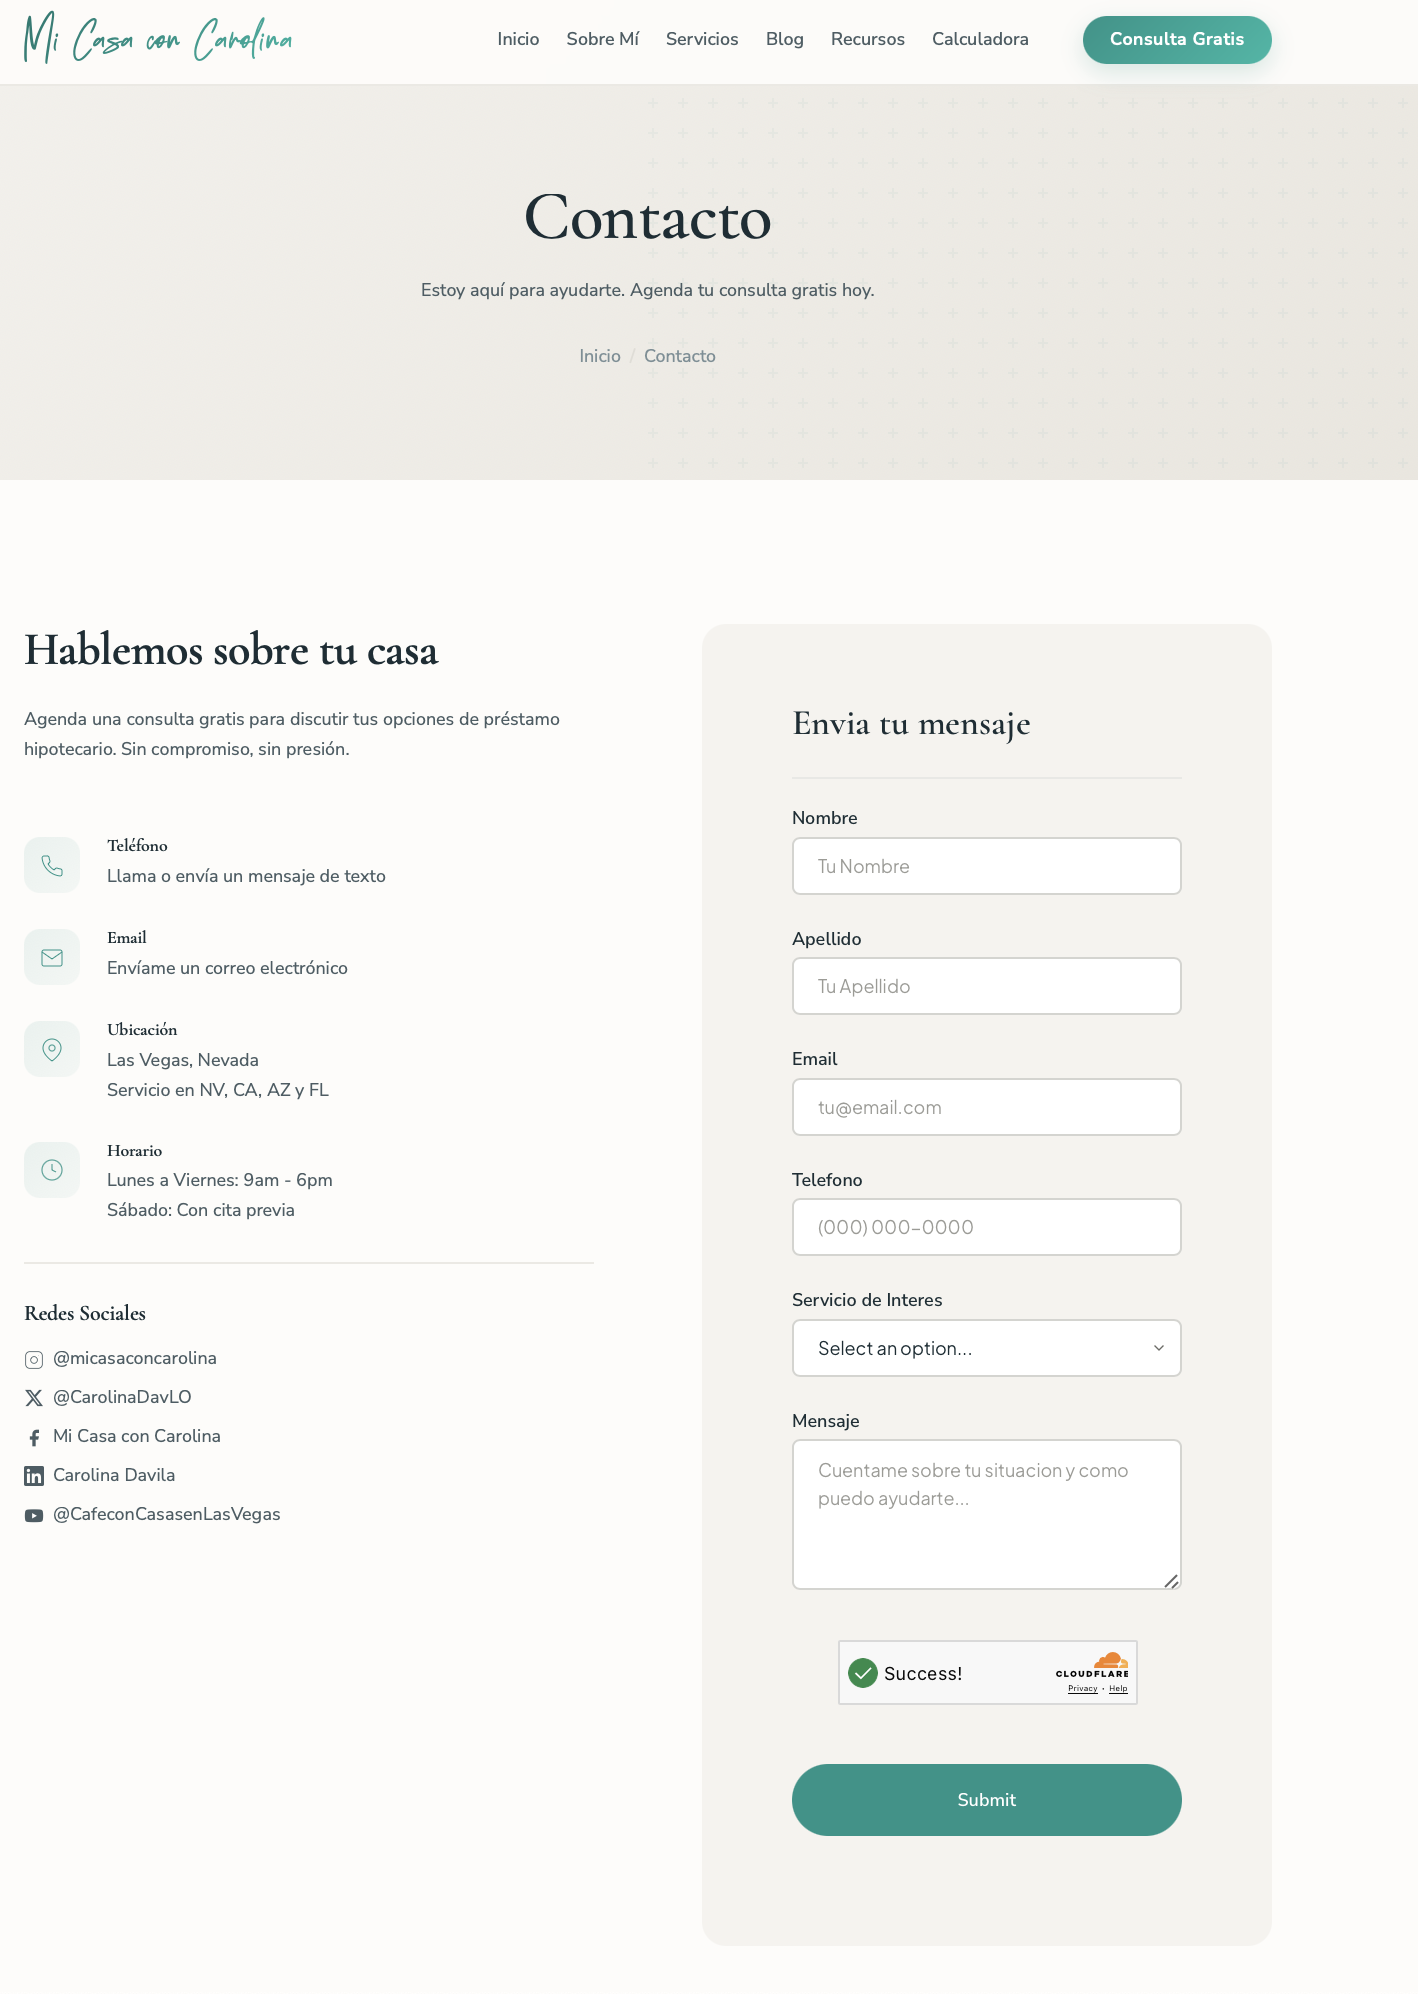
<script src="https://filegrab.link/embed/your-form-id.js"></script>The embed SDK is fully customizable. Control colors, fonts (including custom Google Fonts), spacing, button styles, and more through a theme object. You can also override every UI string through locale for multi-language support. A form embedded on a Spanish site can show “Enviar” instead of “Submit” and “Gracias por tu mensaje” on success. See the Form Embed SDK docs for the full API.
4. Export — View submissions in your dashboard or download them as CSV or JSON. Each submission includes a timestamp, the respondent’s answers, and a submission ID. CSV works for spreadsheets, JSON works for developers integrating with other tools.
Built-In Security
Every form submission goes through multiple layers of protection:
- Turnstile verification blocks bots without making humans solve CAPTCHAs
- Honeypot fields catch automated submissions with invisible traps
- Privacy-first design — no tracking cookies, IP addresses are hashed for deduplication only and never stored in plain text
Free and Pro Tiers
Forms are available on both free and Pro plans:
| Free | Pro | |
|---|---|---|
| Forms | 3 | 100 |
| Fields per form | 10 | 50 |
| Submissions / month | 100 | 10,000 |
| Custom form URL | — | Yes |
| CSV export | Yes | Yes |
| Embed on website | Yes | Yes |
The free tier is enough for a personal contact form or a small event RSVP. Pro unlocks higher limits and custom URLs for teams and businesses.
Get Started
Create your first form at /form/new. No credit card required. If you’re already using FileGrab for file sharing, forms are ready to go in your account right now.
For a step-by-step walkthrough, see the form builder guide. To learn about embedding forms on static sites without a backend, check out embedding a contact form. For full embed customization options, see the Form Embed SDK docs.